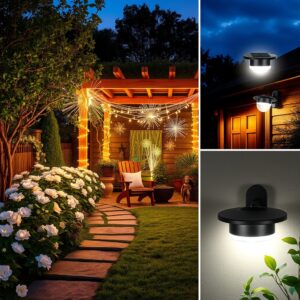
Many people enjoy using solar motion sensor lights to illuminate their backyards. These lights not only provide a convenient and eco-friendly way to brighten outdoor spaces, but they also add an extra layer of security by deterring potential intruders. However, a common issue is that these lights often turn off too quickly, leaving you in the dark when you still need illumination. In this article, we’ll share essential tips to help you extend the duration of your solar motion sensor light.
1. Understanding Solar Motion Sensor Lights
Solar motion sensor lights are innovative outdoor lighting solutions that combine sustainability and security. These lights harness solar energy, making them a practical choice for environmentally conscious homeowners. Here’s a closer look at how they work and their numerous benefits.
How They Work
At the heart of solar motion sensor lights is a solar panel that absorbs sunlight during the day. This solar energy is converted into electricity and stored in a rechargeable battery. When dusk falls, the lights rely on this stored energy to illuminate your outdoor space.
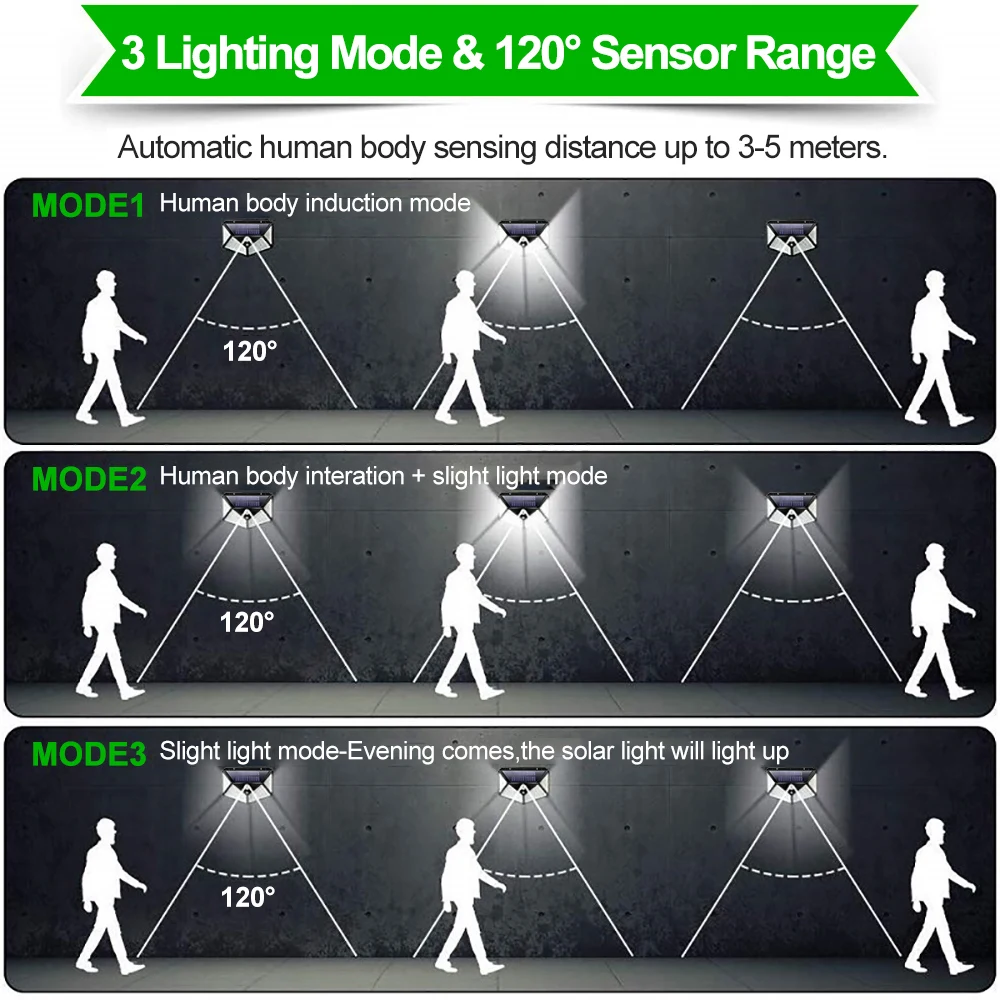
The motion sensor is a critical component of these lights. It uses infrared technology to detect movement within a specified range. When someone walks by, the sensor triggers the light to turn on, providing instant illumination. After a set duration—typically adjustable—the light will turn off automatically to conserve battery power.
Benefits of Solar Motion Sensor Lights
Energy Efficiency: Since they run on solar power, these lights significantly reduce electricity costs. Homeowners can enjoy bright lighting without impacting their utility bills.
Environmental Impact: By utilizing renewable energy, solar motion sensor lights help reduce carbon footprints. They contribute to a more sustainable lifestyle by minimizing reliance on fossil fuels.
Ease of Installation: These lights are generally easy to install, requiring no complicated wiring or electrical work. Most models come with mounting hardware, allowing you to set them up quickly and easily in various locations.
Enhanced Security: The motion-activated feature not only illuminates dark areas but also deters potential intruders. The sudden burst of light can startle and discourage unwanted visitors, making your property safer.
Versatility: Solar motion sensor lights come in various styles and designs, suitable for different applications. Whether you need wall-mounted lights for your home, pathway lights for your garden, or floodlights for larger areas, there’s a solution for every need.
Low Maintenance: These lights typically require minimal maintenance. Regular cleaning of the solar panel to remove dirt and debris will help ensure they operate efficiently, and the rechargeable batteries usually last several years before needing replacement.
Automatic Operation: The convenience of automatic operation means you don’t have to worry about manually turning lights on and off. The lights will activate at dusk and remain off during the day, ensuring efficient use of energy.
2. Adjusting Solar Motion Sensor Light Settings
Properly adjusting the settings of your solar motion sensor light is essential for achieving optimal performance and ensuring it meets your specific needs. Here’s a step-by-step guide to help you find and adjust the sensitivity and duration settings effectively.
Step 1: Locate the Control Panel
Identify the Light: Start by locating your solar motion sensor light. Most lights have a control panel that may be integrated into the light itself or the solar panel.
Check the Manual: If you’re having trouble finding the control panel, consult the user manual or the manufacturer’s website. This resource will often provide specific instructions based on the model you own.
Inspect the Light: Look for small buttons, dials, or switches on the back or side of the light. The control panel may be concealed by a cover, so be sure to check for any removable caps or compartments.
Step 2: Adjust the Sensitivity Setting
Understanding Sensitivity: Sensitivity controls how responsive the motion sensor is to movement. Higher sensitivity settings will trigger the light with minimal motion, while lower settings require more significant movement to activate.
Making Adjustments:
- Locate the Sensitivity Control: This is usually marked with a dial or switch on the control panel.
- Test Different Levels: Begin with the sensitivity set to the default level. Walk in front of the light to see if it activates. Gradually increase or decrease the sensitivity until you find the balance that works best for your environment.
- Consider Environment: If you live in an area with frequent animal activity, you may want to lower the sensitivity to prevent the light from turning on unnecessarily.
Step 3: Modify the Duration Setting
Understanding Duration: The duration setting determines how long the light stays on after being triggered by motion. Finding the right duration is essential to avoid the light shutting off too soon while conserving battery life.
Adjusting the Duration:
- Locate the Duration Control: This setting is often found near the sensitivity control and may be labeled clearly.
- Set the Duration: Adjust the dial or switch according to your preference. Typical settings can range from 10 seconds to several minutes. Test the light by moving in front of it and observing how long it stays on after activation.
- Consider Your Needs: For areas where you need prolonged illumination, such as driveways or pathways, set the duration longer. In spaces where you only need brief lighting, a shorter duration may suffice.
Step 4: Test Your Adjustments
Perform a Test Run: Once you’ve adjusted both the sensitivity and duration settings, conduct a test by walking within the sensor’s range. Observe how the light reacts and if it meets your expectations.
Make Further Adjustments if Necessary: If the light doesn’t perform as desired, go back to the control panel and make further adjustments. Finding the right balance may take a few attempts.
Step 5: Monitor Performance
Regular Check-ins: After adjusting the settings, monitor how well the light operates over the next few days. This will give you a better idea of whether further tweaks are needed.
Seasonal Considerations: Keep in mind that seasonal changes, such as different weather conditions or varying daylight hours, can impact the performance of your solar motion sensor light. You may need to readjust settings as seasons change.
By following these steps, you can effectively adjust the sensitivity and duration settings of your solar motion sensor light to enhance its performance. These adjustments not only improve usability but also ensure that your outdoor space remains well-lit and secure.
3. Keeping Solar Motion Sensor Lights on All Night
If you want your solar motion sensor lights to stay illuminated throughout the night, there are several strategies you can employ. This includes utilizing timers and ensuring your lights have sufficient battery power. Here’s how to effectively implement these solutions.
Using Timers to Extend Light Duration
Understanding Timer Functionality: A timer can override the motion sensor feature, allowing you to set specific durations for how long the light remains on after it is activated. This means you can enjoy continuous light even in areas with little movement.
Selecting the Right Timer:
- Compatibility: Ensure the timer is compatible with your solar motion sensor light. Check the manufacturer’s specifications for wattage and voltage requirements.
- Type of Timer: Choose between mechanical timers, which are simple and cost-effective, or digital timers, which offer more programming flexibility.
Installation Process:
- Wiring the Timer: Connect the timer between the motion sensor light and its power source. Follow the manufacturer’s instructions for wiring to ensure safety and functionality.
- Setting the Timer: Once installed, set the timer according to your preferences. For instance, if you want the light to stay on from dusk until dawn, program it to match these hours.
Testing the Timer: After setup, conduct a test by triggering the motion sensor. Observe how long the light stays on and make any necessary adjustments to the timer settings.
Ensuring Adequate Battery Power
Choosing High-Capacity Batteries: Investing in higher-capacity rechargeable batteries can significantly improve the performance of your solar motion sensor lights. These batteries store more energy, allowing the lights to stay on longer during the night.
Regular Maintenance:
- Cleaning the Solar Panel: Ensure that the solar panel is free of dirt, dust, and debris, as this can hinder its ability to charge effectively. Regularly clean the panel with a soft cloth and mild soap.
- Positioning for Maximum Sunlight: Position your solar lights in areas that receive direct sunlight for most of the day. Avoid shaded spots from trees, buildings, or other obstructions that can limit solar exposure.
Battery Replacement: Over time, rechargeable batteries lose their capacity. Keep an eye on performance; if you notice the light isn’t staying on as long as it used to, it might be time to replace the battery.
Consider Solar Panel Upgrades: If your solar motion sensor light permits, consider upgrading to a larger solar panel. A more extensive panel can capture more sunlight, enhancing the battery’s charging capacity and extending the light duration.
Balancing Light Duration and Battery Life
Smart Usage: While it may be tempting to set your lights to stay on all night, consider the balance between illumination and battery conservation. Using a combination of motion detection and timer settings can help achieve this balance.
Seasonal Adjustments: As the seasons change, so does the amount of sunlight available. In winter, for instance, you may need to adjust the timer to reflect shorter daylight hours and ensure your lights can charge adequately.
Utilizing Motion Detection Wisely: If your goal is to maintain lighting throughout the night, use the motion detection feature strategically. For example, setting a longer duration but keeping the sensitivity lower can help ensure the light stays on without unnecessary activations.
By implementing timers and ensuring adequate battery power, you can effectively keep your solar motion sensor lights illuminated all night. These strategies not only enhance safety and convenience but also ensure that your outdoor spaces remain welcoming and secure after dark.
4. Troubleshooting Solar Motion Sensor Light Issues
Solar motion sensor lights are an excellent addition to outdoor spaces, providing convenience and security. However, like any electronic device, they can experience issues. Here’s a detailed look at common problems and their solutions to help you troubleshoot effectively.
Common Problems
Activation Issues:
- Light Does Not Turn On: If your solar motion sensor light fails to activate, it could be due to several factors, including low battery power, inadequate sunlight exposure, or a malfunctioning sensor.
- Light Stays On Constantly: Conversely, if the light remains on continuously, it might indicate that the motion sensor is overly sensitive or that dirt is obstructing it.
Short Runtime:
- Light Turns Off Too Quickly: If your solar light turns off shortly after being triggered, it may be due to low battery charge or incorrect duration settings.
- Inconsistent Lighting: The light may turn on and off unpredictably, which could stem from environmental factors or issues with the solar panel.
Solutions
Addressing Activation Issues:
- Check Battery Power: Ensure the battery is charged. If the light hasn’t been getting enough sunlight, it may not have enough energy stored. Clean the solar panel to enhance charging efficiency.
- Inspect the Motion Sensor: Look for any obstructions, such as dirt or debris covering the sensor. Clean the sensor gently with a soft cloth to ensure it functions correctly.
- Test Sensitivity Settings: If the light doesn’t activate at all, check the sensitivity settings. Adjust them to see if this resolves the issue. If the sensor is too low, it may not detect your movements effectively.
Resolving Constant Activation:
- Adjust Sensitivity: If the light stays on all the time, try reducing the sensitivity settings. This can help prevent false triggers from minor movements, such as passing animals or wind-blown leaves.
- Positioning: Reposition the light if it is facing areas where motion is frequent, such as streets or pathways. Aim it toward your intended area of coverage, avoiding direct exposure to frequent motion sources.
Fixing Short Runtime:
- Battery Replacement: If the light frequently turns off after a short time, it may be time to replace the battery, especially if it has been in use for several years. Old batteries often lose their capacity to hold a charge.
- Adjust Duration Settings: Review the duration settings on the control panel. If they are set too low, extend them to allow the light to stay on longer after activation.
- Ensure Sufficient Sunlight: Make sure the solar panel receives enough sunlight during the day. If necessary, relocate the light to a sunnier area or consider upgrading to a higher-capacity solar panel.
Troubleshooting Environmental Factors:
- Check Surroundings: Sometimes, environmental conditions like heavy rainfall, fog, or snow can affect the performance of solar lights. Ensure the light is positioned to avoid prolonged exposure to elements that may obstruct its functionality.
- Consider Seasonal Changes: Be mindful that changes in daylight hours and weather conditions can impact how well your solar lights function. Adjust settings accordingly with the changing seasons.
Manual and Manufacturer Support:
- Consult the Manual: If issues persist, refer to the user manual for specific troubleshooting steps tailored to your light model. The manual may have unique instructions or troubleshooting tips that can resolve your issues.
- Contact Manufacturer Support: If you’ve tried all the above solutions and the problem continues, don’t hesitate to reach out to the manufacturer’s customer support. They can provide additional guidance or warranty options if needed.
Conclusion
Extending the duration of your solar motion sensor light is achievable with a few simple adjustments. By understanding the technology, modifying settings, using timers, and troubleshooting common issues, you can enjoy a well-lit outdoor space. With these expert tips, your solar motion sensor light will remain a reliable source of illumination and security for your home.